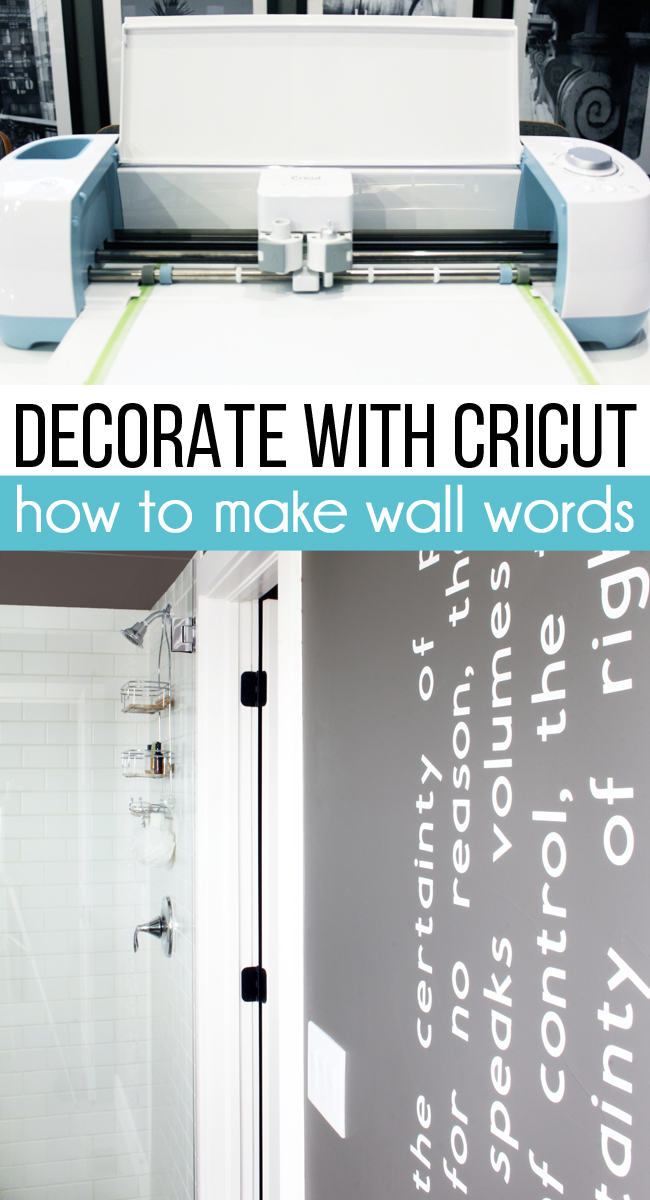
How to Create Wall Words Using Cricut
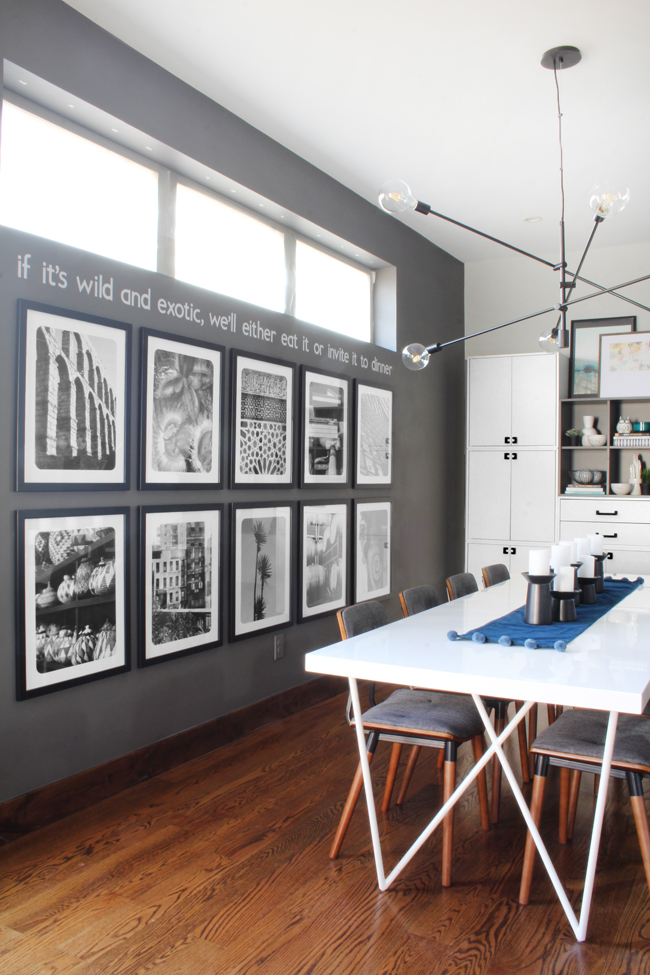
In our kitchen dining area, I struggled for years unsure what to do with the empty wall below our high, skinny window. Finally, I came across a quote (author unknown) that perfectly sums up our love of food, travel, and adventure: “If it’s wild and exotic, we’ll either eat it or invite it to dinner.” Using my Cricut, I cut the quote to fit perfectly below our kitchen window, later adding two rows of photos from our travels.
The design of our guest bedroom was inspired by the hotels that Scott and I stayed at in the Greek Islands on our honeymoon. One of things I loved most at Mykonos Grace Hotel was a poem on the wall of the calming blue and white lounge overlooking the Aegean Sea.
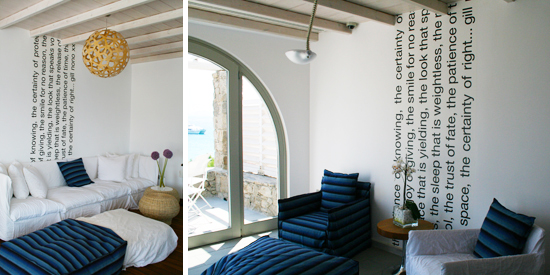
I was immediately taken by both the words of the poem as well as the graphic, vertical layout words on the wall, so I add the same quote to the wall of our guest bathroom.
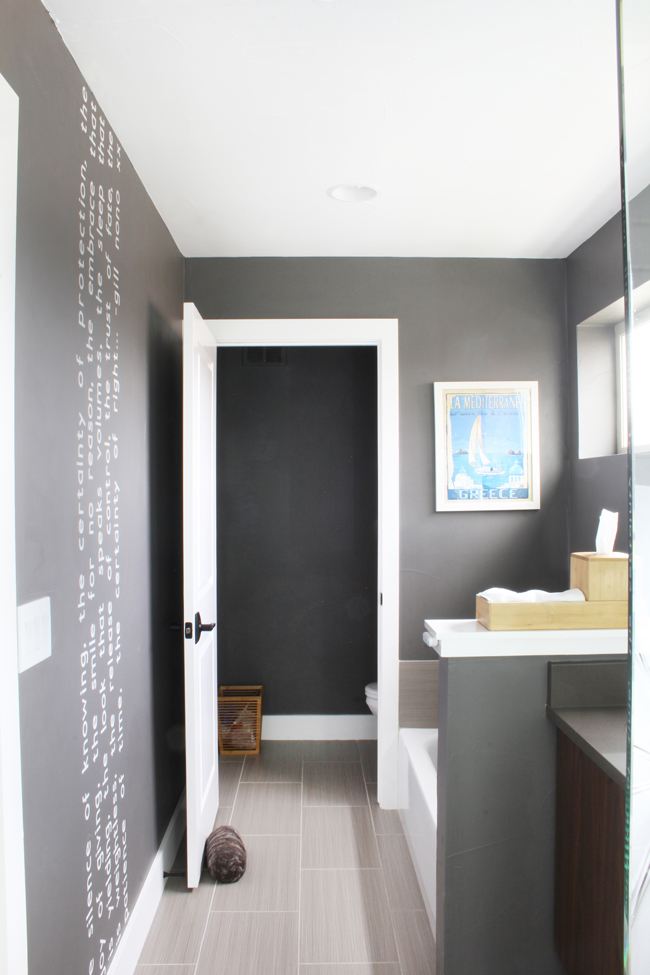
The poem by Gill Nono reads: “The silence of knowing, the certainty of protection, the joy of giving, the smile for no reason, the embrace that is yielding, the look that speaks volumes, the sleep that is weightless, the release of control, the trust of fate, the patience of time, the certainty of right.”
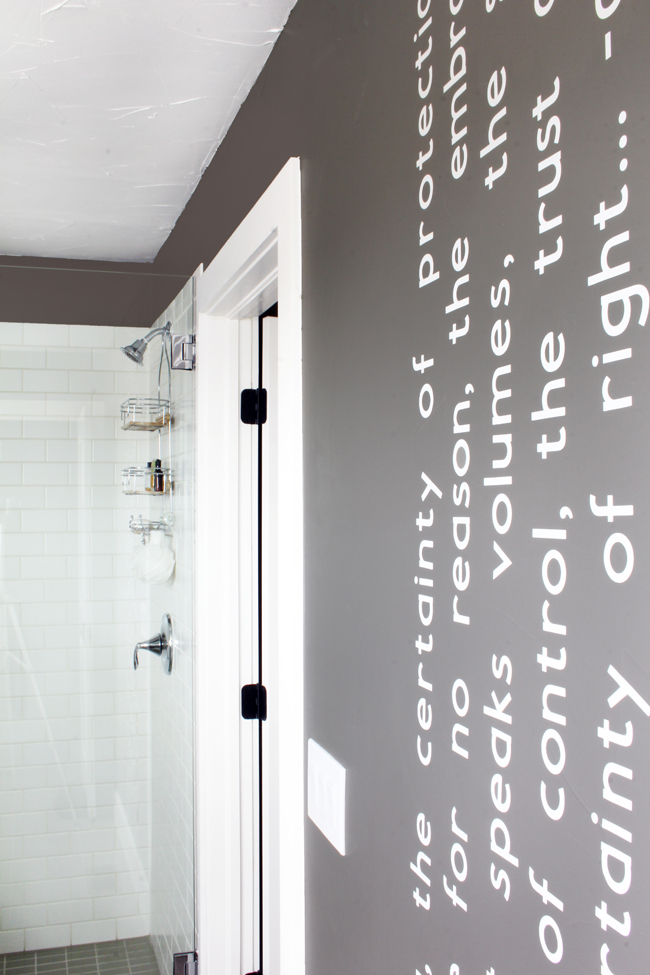
I created the wall quotes in our kitchen and guest bathroom with my Cricut, but both predated my blog so I didn’t have step by step photos and never wrote tutorials for them. I recently decided to add another quote in the boys’ play area, so it was the perfect opportunity to share the simple step by step tutorial.
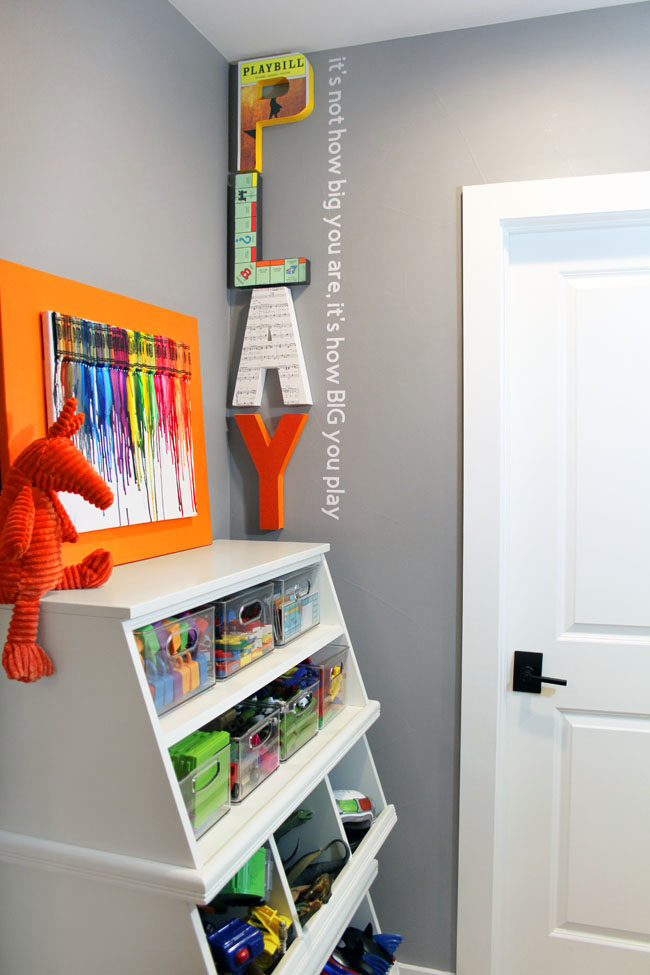
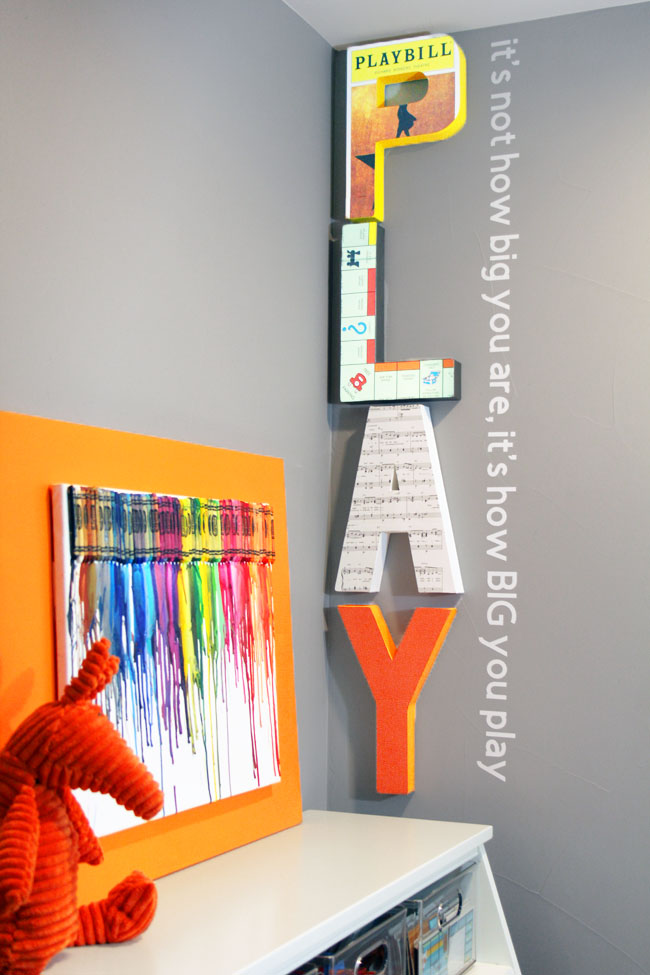
This wall in corner of our basement family room is a great example of how I love to personalize our decor – with the word PLAY representing four of the things our family loves doing together. We all love going to the theater (my husband is an actor, and my boys also love doing plays at school), we love playing board games together, we love music (and both boys are learning to play instruments), and we love playing and watching sports (well, just watching for me, LOL). The orange Y is covered in paper textured like a basketball, although that’s hard to tell in the photo.
I added the quote from legendary basketball coach John Wooden, “It’s not how big you are, it’s how big you play.” While Coach Wooden was talking about leadership in basketball, I want this quote to always remind our family to keep playing, in every sense of the word.
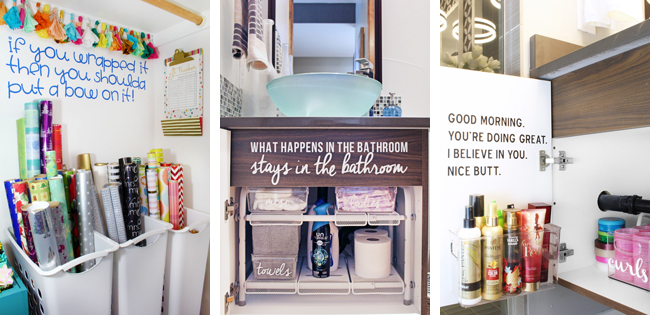
Here are a few more fun ideas for wall words that are “hidden” throughout our house. The first is inside our guest room closet where I’ve organized all of my wrapping paper and supplies, the second is under the sink in our powder room, and the third is under my sink in the master bathroom.
Ok, now that I’ve shown you some examples of how you can use wall words to design a home that uniquely reflects you family, let me show you just how easy it is to create these large scale wall words using Cricut!
Supply List
- Cricut Machine (I used my Cricut Explore Air, but you can also use Cricut Maker or the mini Cricut Joy)
- 12×24 Standard Grip Cricut Mat
- White Removable Vinyl
- Cricut Weeding Tool
- Transfer Tape
- Cricut Scraper Tool
- Level
- Pencil
How to Design & Cut Vinyl Wall Words
- Measure Your Wall To Determine the Maximum Height or Width of Your Wall Words. In my guest bathroom, this meant measuring from the baseboard to the ceiling, in my kitchen, it meant measuring the length of the window that I wanted the words to fit below, and in the playroom, it meant measuring the distance froxpm the top of the toy box to the ceiling.
- Choose a Font for Your Wall Words in Cricut Design Space. Open Design Space and choose the font your want. I always use Cricut Sans because I like a clean, modern font for my wall words.
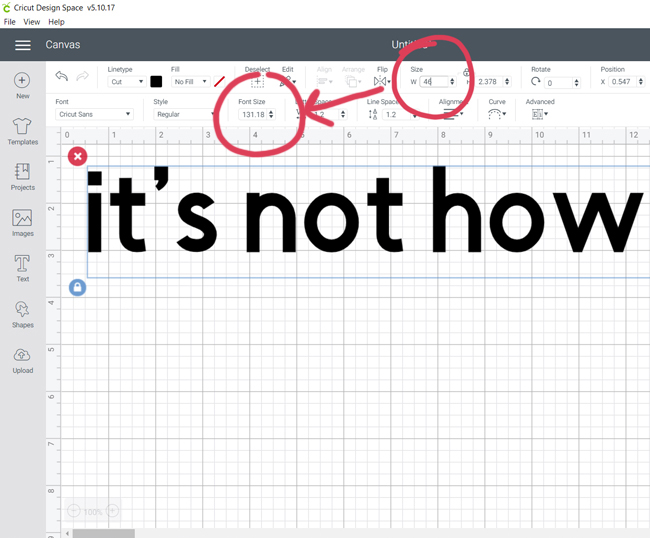
- Size of Your Quote to Fit Your Wall. Since I wanted the quote for the playroom to be in one line spanning the distance from the toy box the ceiling, I typed in the full quote in one text box. Base on my measurements, I knew that the max length of my quote was 48 inches, but I wanted to leave 1″ of extra space at each end, so I set the width of my quote to 46 inches in Design Space. Once I’d set the width, I noted that the corresponding font size was 131.18.
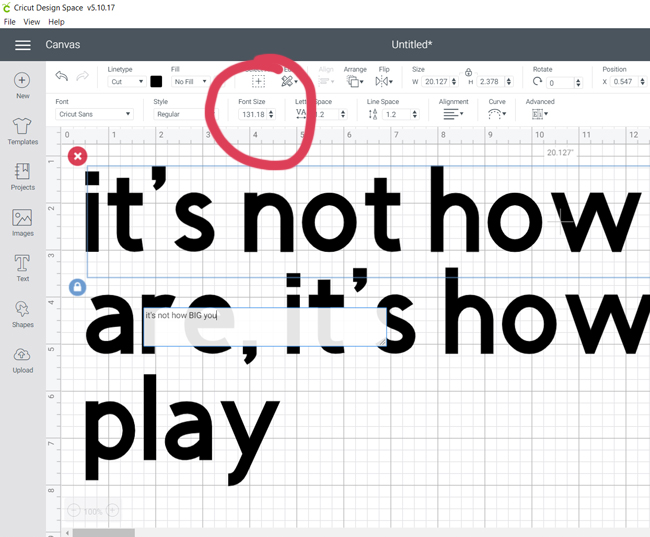
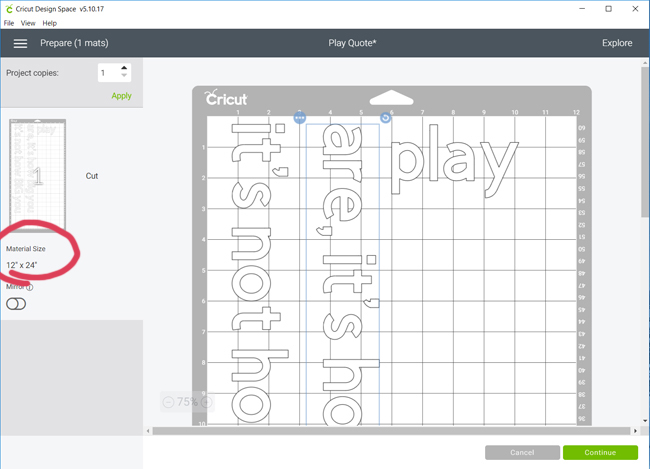
- Break the Quote into Sections to Fit Your Mat. With the entire quote in one text box, Design Space will likely warn you that it’s too big for your mat. In order to fit your quote to your 12″ x 24″ mat, you’ll need to separate your quote into two or more lines (using separate text boxes), with each line of text being no longer than 23.5 inches. As you add each new text box, be sure to set the correct font size for each (using the font size that you determined in step 3).
- Preview Your Cut. Once you’re done designing your quote, click “Make It” in the top right corner of Design Space. On the preview screen, ensure that your mat size is set to 12″x24″. After reviewing your preview, click Continue.
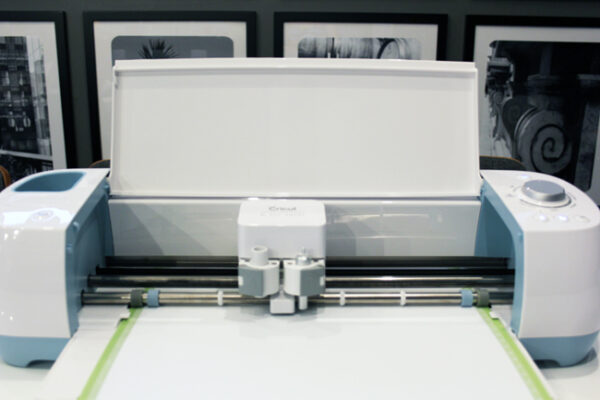
- Cut Out Your Wall Words. Cut a piece of removable adhesive vinyl to fit your mat, load the mat into your Cricut machine, and ensure that your material dial is set to Vinyl. Then begin the cut.
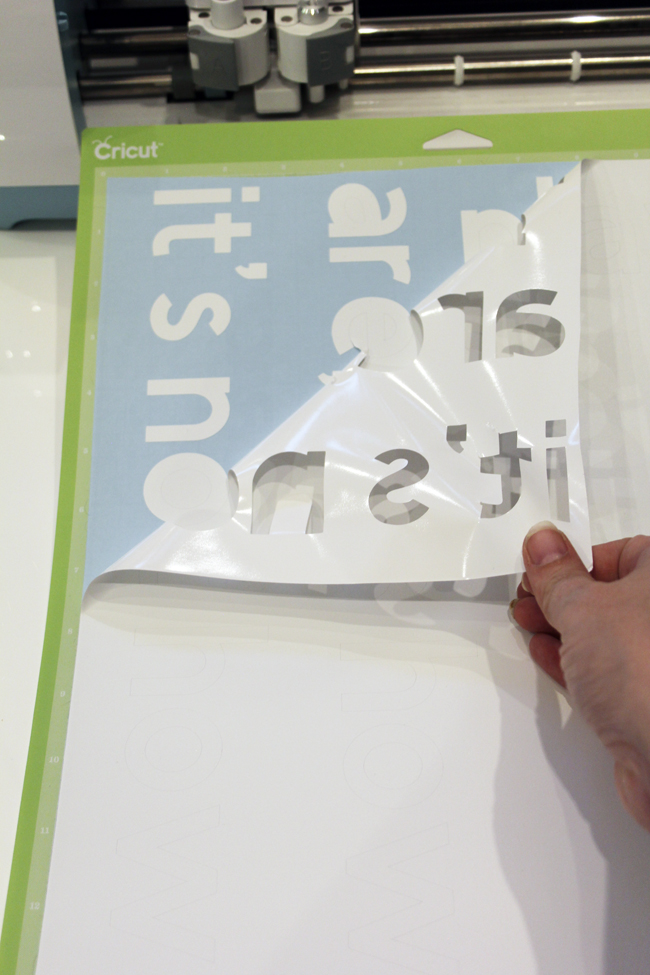
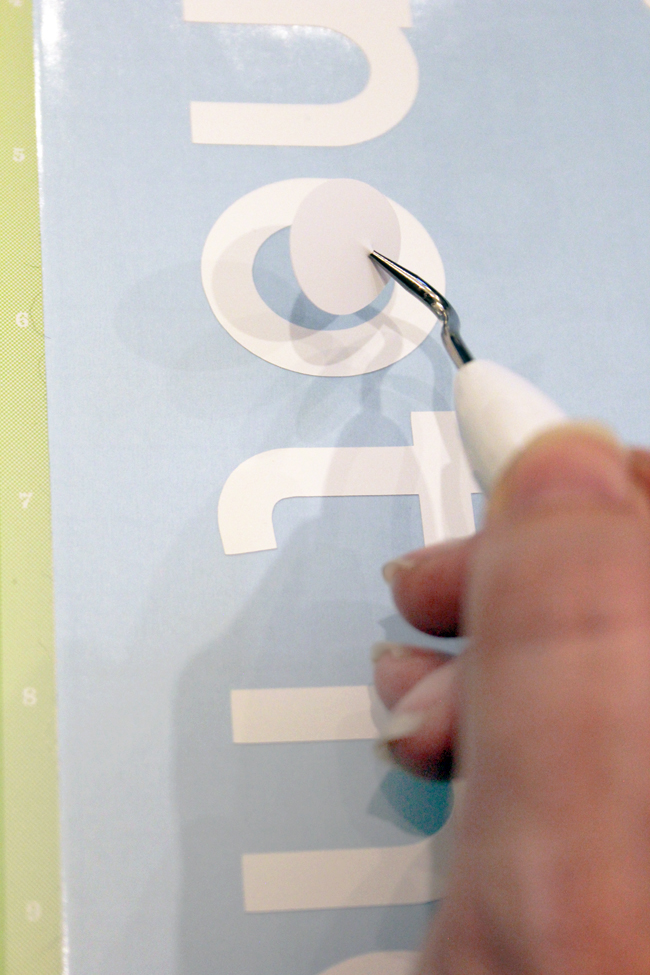
- Weed the Vinyl. Once your cut is complete, unload the mat from your Cricut and peel away the excess vinyl from around your letters. Then use a Cricut weeding tool to remove the small pieces of vinyl inside the letters.
How to Apply Wall Words Using Transfer Tape
- Reassemble Your Words Into One Continuous Line. Once your wall words are are weeded, you need to cut the text into strips so that your quote can be reassembled in to one continuous line.
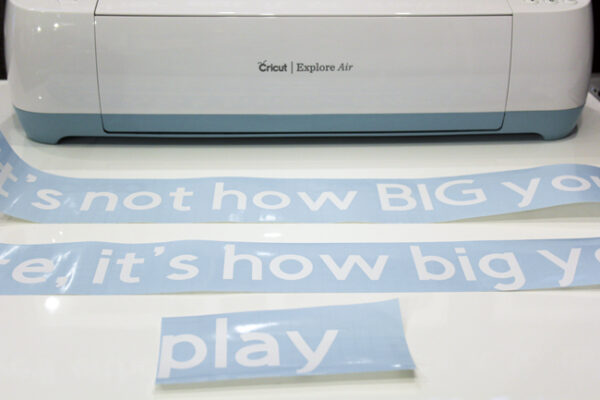
- Prepare Your Quote With Transfer Tape. Cut strips of transfer tape just slightly longer than your sections of letters. Peel the backing off of the first section transfer tape and apply it over the beginning of your quote, aligning the bottom of the letters with one of the guidelines on the transfer tape. Overlap the end of one strip of transfer tape with the start of the next strip of transfer tape to adhere each line of text together into one long, continuous quote.
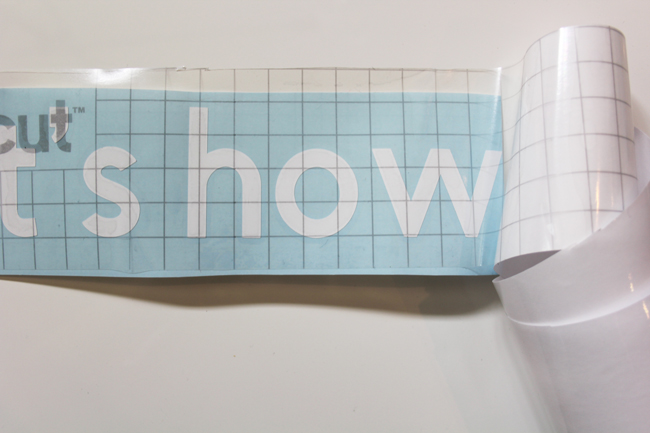
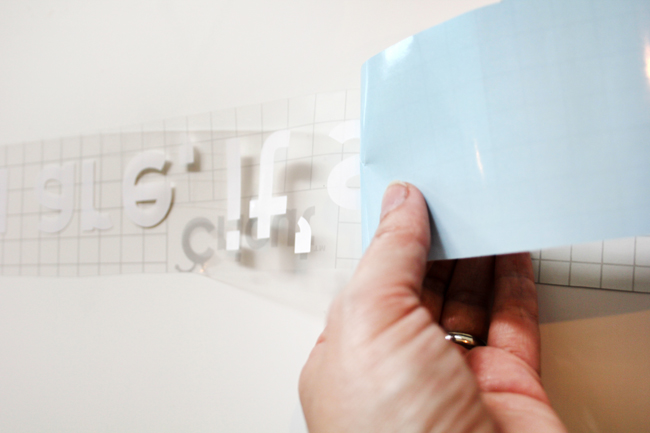
- Remove the Vinyl Backing. Using your Cricut scraper (a kitchen scraper or the flat edge of a butter knife also works well), firmly burnish (rub) the transfer tape to the vinyl, then flip it over and slowly peel away the blue backing, leaving the vinyl letters attached to the transfer tape.
- Mark a Level Line on the Wall. Using a long level and a white colored pencil, mark a few lines on the wall along the distance that the quote will span. These pencil lines will easily wipe away later. If you have white walls, use a regular pencil but make your lines as light as possible.
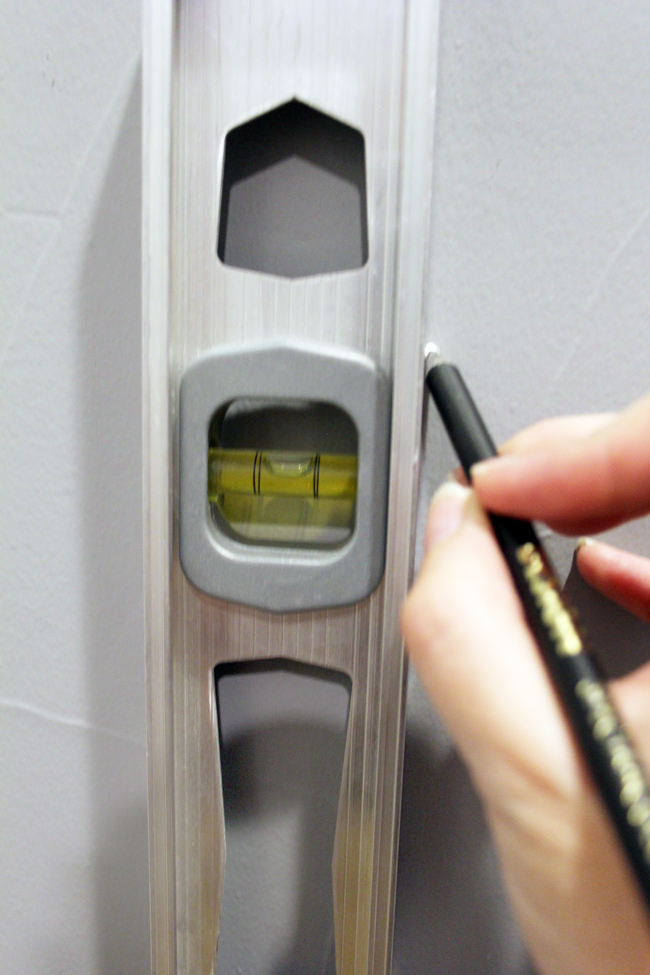
- Align Transfer Tape With Level Pencil Lines. Align the guideline on your transfer tape with the white level lines that you’ve marked on the wall.
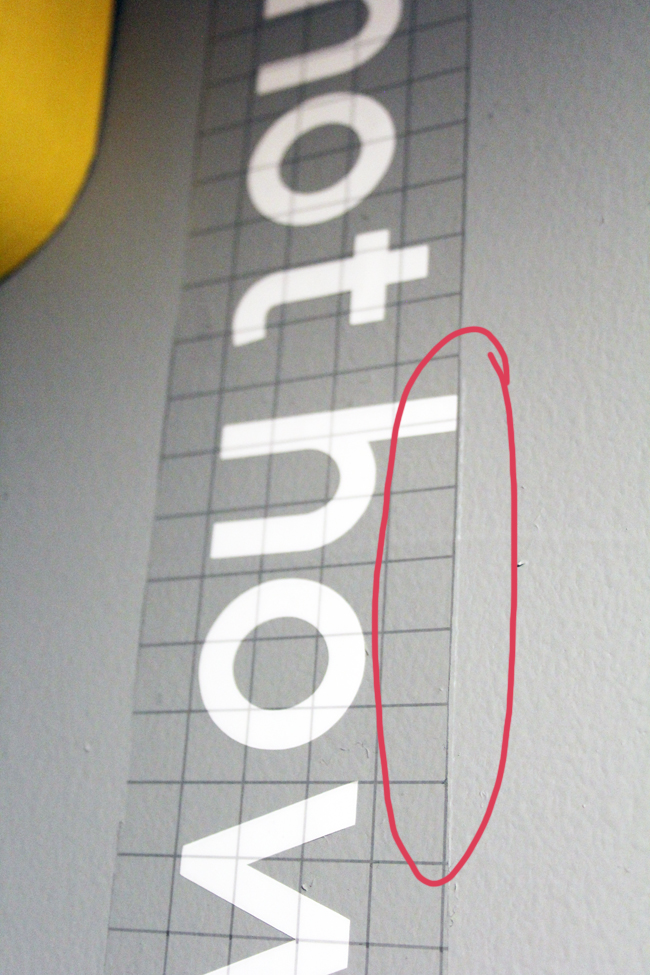
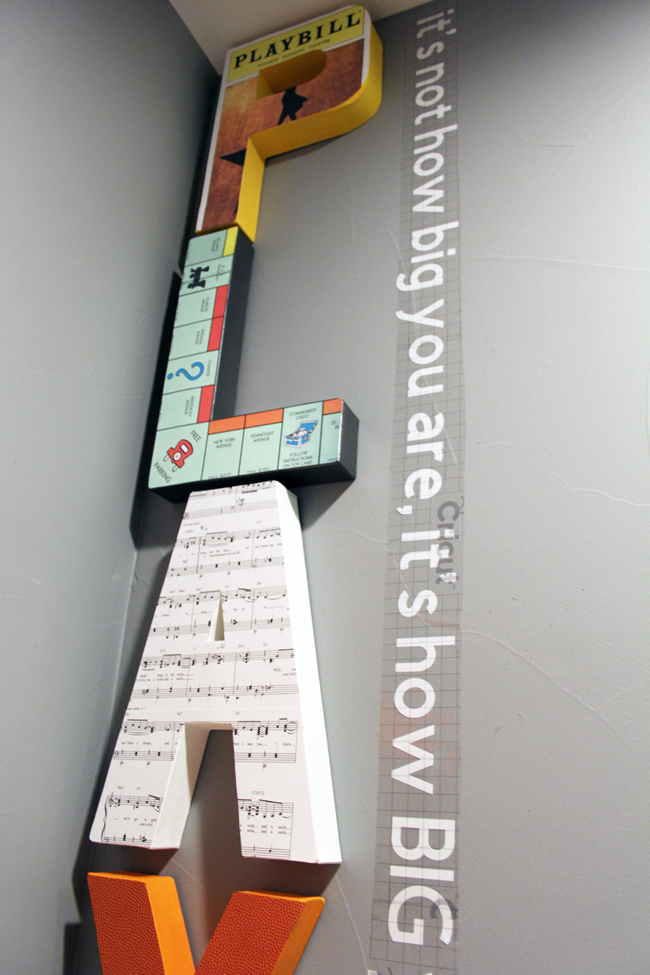
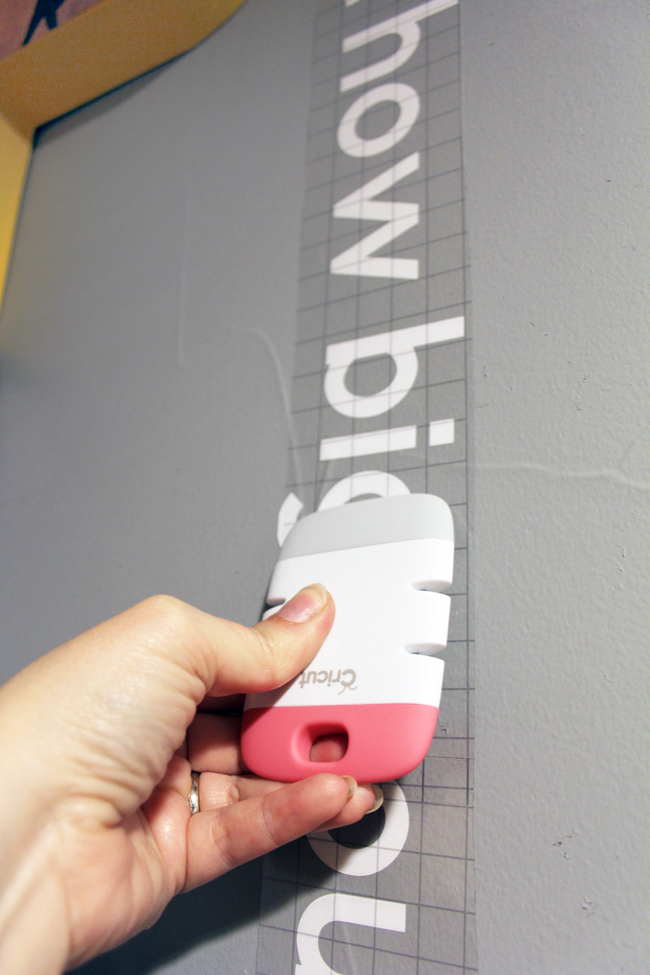
- Burnish the Vinyl Quote to On the Wall. Using a scraper tool, firmly burnish (press/rub) the vinyl to adhere it to the wall.
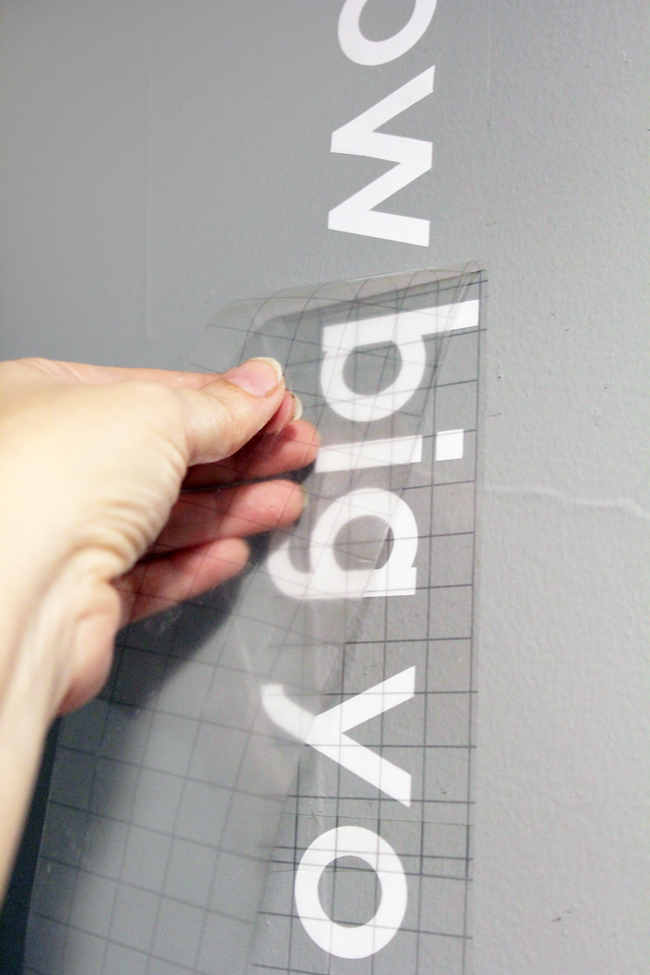
- Peel Away the Transfer Tape. Slowly, peel the transfer tape away from the wall at a 45 degree angle. If the letters are sticking to the transfer tape, pause and burnish again before continuing.
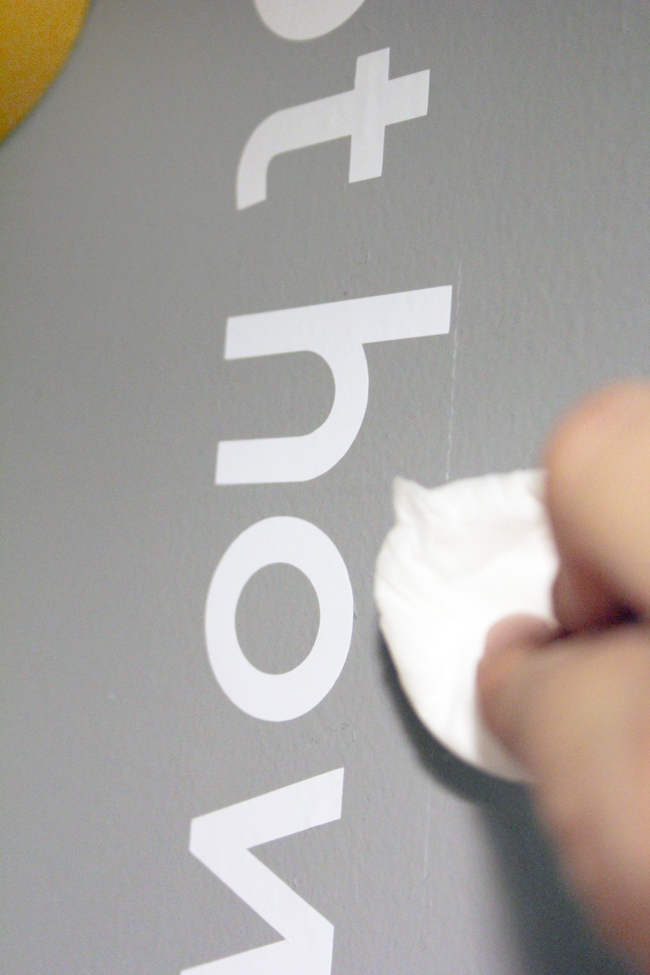
- Wipe Away Your Level Marks. Using a barely damp cloth, wipe away the light pencil lines that you drew in step 11. Then step back to admire your work! You’re all done!
I’d love to see how you’ve used wall words to personalize your decor! Comment below, or tag me in your photos on Instagram @blueistyle.
